Wednesday, 22 February 2012

Haggis sausage rolls


Haggis sausage rolls - there is no way to make these bad boys look sexy

Ok, ok I’m sure I know what you are thinking ‘euch sausage rolls’. Am I right? The reason why I know this is because before I tried these bad boys I initially thought the same. Please don’t be offended S. and M.. I guess I had just too many bad memories of the frozen and reheated mashed up pigs snout wrapped in soggy, stodgy ‘pastry’ type sausage rolls. These ones my dear reader are from an entirely different branch of the family tree. For example, if the ready made frozen ones are the Govan Ned these are the Highland laird; a much classier affair.

It really gets my goat when a blogger drones on about how great the dish is and how you really, really need to try it to believe it et cetra, et cetra so all I’m going to say is this; if you like haggis you will probably enjoy it and everyone that I’ve made these for has asked for the recipe. Always a good sign.

Haggis sausage rolls
Preheat oven to 180 degrees celcius

1 medium sized onion finely chopped
few sage leaves torn
1 tbs of oil
400g minced pork (shoulder works well)
400g decent ready prepared haggis
a good pinch of salt
a few grinds of black pepper
2 eggs
750g of ready made all butter puff pastry

Soften the onion in the oil in a frying pan over a moderate heat until translucent.
Add in the torn sage leaves and cook through for another minute.
Add the onion and sage to a large bowl along with the pork mince and haggis and one of the eggs and salt and pepper. Mix well.
Roll out the pastry until it is about 1/2cm thick.
Divide the mixture into 3 and make into long sausage shapes along the length of the pastry.
Roll the pastry over the sausage mixture and press down the edges with a fork.
Beat the remaining egg and brush this over the pastry.
Cut the rolls into 3-4cm lengths and bake in the oven for 20-30 minutes until cooked through and the pastry is golden brown and flaky.

Enjoy.


Friday, 3 February 2012

Salted pistachio chocolate cookies


Salted pistachio and chocolate cookies


I guess I’ve got bloggers’s block and it’s getting to be a real pain. When I’m not out and about with friends or pottering away in my kitchen I want to be spending my time on the right side of my brain; taking photos, trying new flavour combinations, starting to write... For those that follow thetwicebitten regularly you might have noticed that the number of posts have dropped from an enthusiastic 7 per month when I first started to a dismal 1 per month of late. At first I brushed it off as “just a bit busy at the moment” and tried to avoid acknowledging my difficulty. Quiet Sunday afternoons that I had pencilled in to write came and went with no fruits of my labour at the end of them. It just felt so forced and contrived. Anne Lammont in “Bird by Bird” beautifully captures hating what you write and it’s a book I’ve been coming back to time and time again. I’m going to plod on thanks to all the support from my lovely friends and I'm going to try to remember that the real prize is in the progress. In the meantime I’m going to  keep filling my tummy with yummy things and fill my mind with the food writing greats. Here goes nothing.

Salted pistachio and chocolate cookies

Salted pistachio chocolate cookies – adapted from the hummingbird bakery cookbook
Makes12 cookies
You will need 2 baking trays lined with greaseproof paper
Preheat oven to 170 degrees

50g unsalted butter
300g dark chocolate, roughly chopped
2 eggs
170g light muscovado sugar
¼ tsp vanilla extract
85g plain flour
½ tsp sea salt
½ tsp baking powder
70g shelled pistachios - chopped
few pinches of sea salt

Melt the butter and 225g of the chocolate in a heatproof bowl over a saucepan of simmering water.
Remove from the heat once smooth.
Beat the eggs, sugar and vanilla extract with an electric whisk until well mixed.
Pour in the chocolate mixture to the egg mixture and stir in with a wooden spoon.
Sift in the flour, ½ tsp of salt and the baking powder in 3 additions into the chocolate eggy mixture and stir until mixed.
Stir in the remaining 75g of chocolate.
Arrange the mixture with 6 equal sized dollops of cookie mixture per baking tray.
Be sure to leave enough space between them as they will spread during cooking.
Sprinkle the pistachios and the sea salt to taste onto the top of the cookies.
Bake for 10-15 minutes, checking after 10 minutes.
They are ready when glossy and cracked on top, they will still be soft and gooey.
Leave to cook a little before turning out to cool completely on a wire rack.

Enjoy

Salted pistachio and chocolate cookies


Sunday, 8 January 2012

Welcome 2012/Midwinter’s tart

Midwinter's tart - cavolo nero open filo tart


I’m probably a little bit late in the game but it would feel wrong not to mark the New Year with a little post. New Year’s Eve was spent with close friends at A.’s grandpa’s cottage. It was lovely being back there after years of memories; from birthday parties as children to camping there as bolshy teenagers. The gamekeeper was there when we arrived, a real character and I don’t think I’ll ever get bored of hearing about the time he shared a mars bar with HRH “Wills” or the time he drank a 2 half pints of vodka not to loose face.  People arrived in dribs and drabs, hugs were exchanged and glasses filled and emptied. Cheeses and other goodies were laid out, scoffed with more food miraculously appearing at any hint of a spare space in our bellies. Highlights include Nigella’s Christmas rocky roads and S. and M.’s amazing haggis sausage rolls (recipe to follow soon). We welcomed in the New Year with sweet Asti in glasses with little pheasants on them and sang and hummed our way through Auld Lang Syne. None of us had a clue as to the words to the second verse. As the night went on the party games got started and my competitive nature came out. We laughed and laughed. It was one of those nights where I felt just so happy to have the awesome friends that I have.

are these not the cutest glasses ever?
T. doing the highland fling

Seeing as it’s now January I guess we are all supposed to be very good and all on diets but personally I can’t think of anything worse than a calorie sanctioned soggy January. This is my toast to enjoying a little bit of the things you like to eat without the guilt. I’m not morbidly obese yet. I’ve called it midwinter’s tart as pretty much all I could see at the farmer's market was cavolo nero and onions, bring on the first of the spring veg. In the meantime i'll make do with a cheeky recipe title. 

Midwinter’s tart – inspired by Jamie Oliver
Serves 6 – as a lunch with crusty bread and salad
Preheat the oven to 180°c

1 packet of readymade filo pasty approx 5-6 sheets
30g melted butter
300ml full or low fat crème fraiche
3 egg yolks
2 small onions – quartered, then finely sliced
oil for frying
approx 10 – 12 cavolo nero leaves or kale – finely shredded tough stalky bits and all
3-5 anchovy fillets – roughly chopped
30g grated parmesan
salt and pepper to season
zest of half a lemon

Carefully remove the pastry from the packet and lay in your baking dish leaving a few cm overhanging the edges.
Brush gently with the melted butter and continue to layer up the pasty until you have finished the packet.
Mix the egg yolks with the crème fraiche, season and add this to the pastry.
Fry the onions with a little salt over a medium heat until slightly caramelised; this will take approx 5-8 minutes
Mix the fried onions, cavolo nero, parmesan and anchovy together and add this to the tart.
Brush the edges of the pasty with the melted butter and bake the tart for approx 20 minutes until golden brown.
Grate the lemon zest over the tart and leave to stand for 5 minutes before serving.

Enjoy.

Midwinter's tart - cavolo nero filo tart


Tuesday, 20 December 2011

What makes Christmas Christmassy?


Gingerbread hearts

This year I have been super excited about Christmas, as in SUPER EXCITED. I’ve “stepped into Christmas” big style. Imagine a little kid running mad around her living room squealing and winding all the adults up and you are getting close. I think I must be pretty annoying right now. The flat looks like a mistletoe tree has exploded in it, there are little sprigs all over the place just in case. I’m hedging my bets. I have spent many a quiet moment drifting off into a daydream about seeing my chums, spending time with my grandparents and munching on the fabulous festive food that is yet to come . . .

our lovely Christmas tree

In an ode to Christmas I’ve composed a what makes Christmas Christmassy list.

  1. Tinsel in my hair at work (a naff but compulsory accessory in the hospital at Christmas)
  2. Lugging a 6ft fir tree up the 3 flights of stairs to our flat.
  3. The free bar at my boyfriend's office party
  4. Pigs in blankets
  5. Christmas Eve diner with the Glasgow girls
  6. Vacherin Mont D’Or
  7. My Dad’s incredible to-the-minute Christmas lunch planner
  8. Making gingerbread hearts for decorating the tree, twee moi?
  9. Lazy pajama morning on boxing day 
So dear reader, tell me, what makes Christmas Christmassy for you? What makes your day?

gingerbread heart tree decorations

My lovely sister came to stay with me last weekend and in amongst the mulled wine glugging, present wrapping by the fireside and other clichéd Christmassy things to do we made these gingerbread hearts. Tasty and festive, a winning combination.

Gingerbread  - barely adapted from the Hummingbird bakery cookbook
Oven preheated to 180°

400g plain flour
¾ tsp bicarbonate of soda
2 tsp ground ginger
2 tsp ground cinnamon
¼ tsp ground nutmeg
½ tsp salt
180g unsalted butter – at room temperature
125g light or dark muscovado sugar
1 egg
125g black treacle

Sift together the flour, bicarbonate, ginger, cinnamon, nutmeg and salt.
Set aside till later.

Add the butter and sugar to a separate bowl and mix together with a handheld whisk until light and fluffy.

Add in the egg and mix until incorporated.

Scrape down any unmixed ingredients as required.

Add in the flour mixture one tablespoon at a time, continuing to mix throughout.

The Hummingbird bakery advises leaving the dough over night in the fridge but we didn’t have the patience. We used the dough straight away and all was well.

Lightly dust your worktop and rolling pin and roll out your dough until it is about 5mm thick.

Use your cutters to make shapes and transfer onto a tray lined with greaseproof paper.

Make sure you leave plenty of space between them as they can spread slightly in the heat.

If you are making your gingerbread into decorations pierce the dough to make a 5mm hole. We used a chopstick to do this.

Bake for approx 12 minutes.

Leave to cool slightly before turning out onto a wire rack to cool completely.

Enjoy and have yourself a truly wonderful Christmas.


Sunday, 27 November 2011

Baked whole pumpkins with gooey cheesy wonderfulness

Baked whole pumpkins with gooey cheesy wonderfulness
Firstly I would like to start off by apologising for things being a bit quiet here at ‘twicebitten’ towers over the last month. I’ve been backpacking around Northern India and had rather hoped to come back with lots of awesome curry recipes to share with you. Sadly I’ve come back empty handed. None of the recipes from a day at an Udaipur cookschool have met my exacting standards so I thought I would honour the freezing late Autumn weekend with a real comfort food warmer; whole baked pumpkin with lots of lovely cream and gooey cheese. Cholesterol, what cholesterol. This is eating in the danger zone!

pumpkins
Since we got back it feels like one massive Christmas explosion, everywhere I look is party dresses, wreaths and discounted alcohol. I’ve caught the Crimbo bug and boy have I got it bad. It’s certainly more enjoyable than that bout of Delhi-belly I inevitably had (groan).  I guess the reason for my excitement is because it’s the time of year when all my favourite people in the whole world come back to Scotland and I get a fortnight full of long boozy lunches, side splitting evenings and the best hugs around. I can’t wait, roll out the turkey. 4 weeks and counting…

Baked whole pumpkins
This baked whole pumpkin recipe is so simple, it’s great to just pop in the oven, grab the Sunday papers and curl up for an hour before pulling it out and tucking in. It’s lazy weekend perfection. This dish works great like a fondue, dunking your bread into the gooey cheesy wonderfulness or alternatively you can scoop the pumpkin flesh into the cheesy mixture and then smear it on top of something like thick slices of sourdough toast.

Baked whole pumpkin with cream and gooey cheese – serves 2
Oven preheated to 180°

2 small pumpkins or squash such as acorn squash
175g of melty alpine cheese such as comte
125ml double cream
1/4tsp freshly grated nutmeg
salt and pepper to season

Take off the tops of the pumpkins and scoop out the seeds with a spoon.
Add the nutmeg, cheese and cream to the pumpkin cavity and pop the top of the pumpkin back on.
Bake in the oven for an hour to an hour to an hour and a quarter depending on the size of your pumpkins.
You may need to cover with tinfoil if they are beginning to look a bit burnt after 20-30 mins.
You can tell when your pumpkins are cooked if you are able to easily stick a knife into the flesh.
Season to taste.

Enjoy.
Baked whole pumpkins with gooey cheesy wonderfulness

Sunday, 30 October 2011

What do you say? Chef’s salad


Chef's salad


Today has just been a bit surreal and I’m feeling a little weirded out. Today I walked past the amazing Molly Wizenberg of Orangette fame! It’s not often you happen to pop out for a walk and a baguette and bump into someone you totally admire/kinda want to be on a side street a mere two minutes from your home. It was very exciting but all I could muster was a smile and crimson cheeks. No words would come out but in a way I’m glad. I don’t think I would have been able to talk much sense. The boyfriend who was completely oblivious as to who had just pasted us thought I had experienced a small stroke due to my ever-reddening face. He proceeded to tease my blushing throughout the day. Charming.

I’m not entirely sure why I felt such a strong reaction. I think it may have been because I had just walked passed a person who’s blog posts have touched and moved me, who’s photos have inspired me and who’s humanity has humbled me. The amazing thing was she looked so down to earth and friendly. We were almost in matching outfits for Pete’s sake. We were just two girls, out with friends, taking a walk in the New Town. I guess, maybe in that moment, I felt my aspirations were more achievable. Maybe given enough time I could try to be as creative as her? Maybe given enough effort.

On a completely unrelated note I’ve wanted to share this recipe for chef’s salad for a week or two now. I had it as a starter for our anniversary meal and it was perfectly balanced, wonderfully simple and relied on awesome ingredients. It is a recipe just up my street, just like Molly!

Chef’s Salad – serves 2

1 echalion shallot – very finely cut
50ml vegetable oil
1tsp salt
300g new potatoes
100g smoked bacon lardons
100g comte – cut into 2cm by 1cm (ish) cubes
One head of little gem – cut into 2-3cm slices
50g mixed salad leaves – herby, flavourful leaves work best
2 eggs at room temperature
5 dsp extra virgin olive oil
1 dsp white wine vinegar
1 dsp dijon mustard
salt and pepper
oil for frying

Add the shallot to the vegetable oil with 1tsp of salt, stir firmly and leave to stand.
Add the potatoes to a pan of salted, boiling water and leave to cook over a moderately high heat.
Fry off the lardons over a high heat until very crispy. Set aside on kitchen towel until later.
Add the eggs to a pan of warm water and bring up to the boil, cook for 6 minutes, drain and leave to stand in cold water until later.
Slice the cooked new potatoes and add them to the pan used to cook the lardons, season well and cook until the edges are crispy then set aside.
In a jam jar, add the extra virgin olive oil, white wine vinegar, dijon mustard and seasoning to taste, shake well.
Remove the shallots from the vegetable oil and add them to a large bowl with the sliced little gem, salad leaves, lardons, comte and fried potato slices.
Add the salad dressing to this bowl and mix though.
Peel the eggs and arrange on top.

Enjoy.


Sunday, 16 October 2011

Elderberry and damson crumble - Where has all the time gone?


Elderberries

 I’m actually scared how fast time goes by. Autumn snuck up so quickly and winter is doing much the same. It’s bloody dark in the morning for Pete’s sake. I’ve really not made the most of the damson season that is drawing rapidly to a close as I write. I had the best intentions of making damson vodka, damson fragipane… Guess I’ll have to shelf those ideas till next year. I hope they aren’t too dusty in there. Chatting to one of my oldest chums at the weekend we were in such astonishment that we hadn’t seen each other in two months that she checked her diary. Sure enough, we hadn’t seen each other. All that time had gone by and what had I done? Eat, sleep, work, moan, holiday, hoover, kiss, walk, cook, natter, laugh…

Damsons

My Mum forwarded me Steve Jobs' commencement speech to Stanford University in 2005 and these words resonated greatly with me, “remembering that I'll be dead soon is the most important tool I've ever encountered to help me make the big choices in life. Because almost everything — all external expectations, all pride, all fear of embarrassment or failure - these things just fall away in the face of death, leaving only is what is truly important. Remembering that you are going to die is the best way I know to avoid the trap of thinking you have something to lose. You are already naked. There is no reason not to follow your heart.”

I guess our time is so precious here on this “pale blue dot”. Death and change really are the only constants. I’m going to make the effort to be more aware of my time and then maybe I wont miss the damson season next year (and might actually do something useful with my evening).

This is a lovely little treat of a recipe. I’ve kept the crumble topping simple, almost like shortbread, to really show off the flavour of the fruit and berries. Elderberries are also a great way to get into foraging as they are easy to recognise and hugely common.

Damson and elderberry crumble with a bit of vanilla ice cream

Elderberry and Damson crumble – serves 4 – 6
Oven preheated to 180°C

For the fruit filling -
600g damsons
100g elderberries (about 10 heads of berries)
70g caster sugar

For the crumble topping -
100g plain flour
40g caster sugar
50g butter (at room temperature)

De-stone the damsons if you so wish.
Add the damsons, elderberries, sugar and a splash of water to a pan over a moderate heat.
Whilst the fruit is cooking make the crumble mix by rubbing the flour and butter together until you get an even, sandy texture.
Add the sugar to the flour and butter mixture and stir.
Stir occasionally till the damsons are soft.
Once the fruit has cooked add more sugar to taste as required.
Add the fruit mixture to an ovenproof dish and add the crumble topping to the top of it and gently pat down.
Cook for 15 – 20 minutes until light golden brown.
Serve with ice cream or crème fraiche.

Enjoy.


Wednesday, 5 October 2011

Home cured salmon with beetroot

beetroot home cured salmon with rye bread, cream cheese and dill

Sometimes I get an idea in my head, it sticks and no matter what I do, it is hard to shake it out of there. These ideas are almost entirely about food; my brain is a fatty. This recipe is one such example, I’ve been waiting months for the beetroot to appear again on the market stalls. Despite the long wait it didn’t disappoint.  The report card would say, “exceeds expectations”.

salmon with beetroot and vodka (russian porn)

Being shallow, this is an incredibly pretty little dish; deeply pink tinged fringes of the salmon, cut so thin it is almost translucent. The taste was also pretty special; slick, fatty salmon with a hint of umami from the curing liquor. Yummy (even if I do say so myself).

side of salmon with some of the beetroot curing liquor

I served it with rye bread, cream cheese, a smattering of dill fronds and a squeeze of lemon. It was a wonderful simple lunch.


Home cured salmon with beetroot

A side of sashimi grade salmon 500 – 600g
75g sea salt
75g caster sugar
200g grated beetroot
6dsp vodka

Ensure the salmon is clean and remove any remaining bones with tweezers.
Mix all the ingredients, except the salmon, together.
Put half of the beetroot mixture into a glass or ceramic container big enough for the fish.
Add the fish flesh side up and add the remaining beetroot mixture on top.
Cover with cling film and pop in the fridge.
After 24 hours turn the salmon over and cover with the mixture.
Leave the salmon for another 24 – 48 hours.
When you are ready to eat, remove the salmon and rinse it under cold running water briefly just to remove some of the salt.
Pat dry with kitchen towel.
Cut on a diagonal and serve.

Enjoy.


Wednesday, 28 September 2011

Wild mushroom tart with lemon and thyme


hedgehog mushroom


Aw how wonderful it is to get away. Last weekend the boyfriend and I headed up to the Cairngorms for some much needed R and R. The boyfriend has been super busy over the summer doing a very intensive art course and last weekend was the first chance we had to get away together. It was nice to get a bit of attention again hehe. We braved the impending autumn, wrapped up warm and set up camp under ancient native Scots pine trees by the side of a little bumbling burn.

some of our mushroom bounty

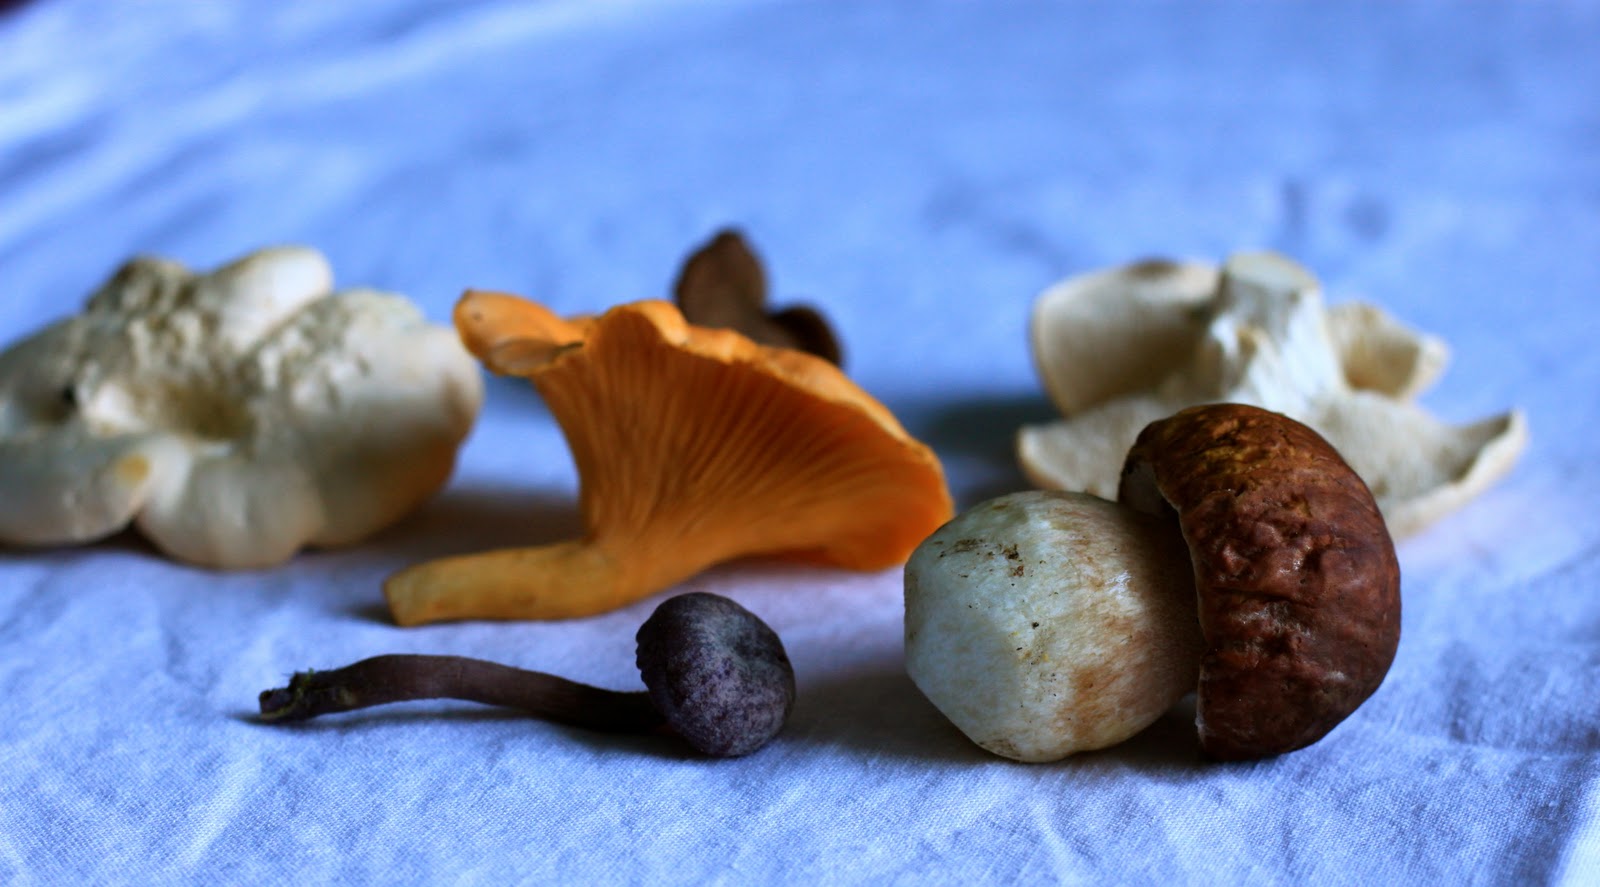
We took a little walk around Loch an Eilein just as it was beginning to get dusky. It wasn’t long before we came across masses of yummy mushrooms: chanterelles, golden chanterelles, amethyst deceivers, hedgehogs... The boyfriend was super excited to find a perfect specimen of a cep; he was smiling ear to ear. We have been foraging for just over a year now and it’s nice getting to learn more and more; the nuances of each mushroom’s preferred haunt.

cep-tastic

Evening came and we headed out for dinner, no mucking around with a camping stove for me. The Old Bridge Inn really does know how to do an exceptional steak, we enjoyed it by the fireside with whisky in hand. It was so lovely to spend some time with the boyfriend, after almost 6 years together we still marvel at how in love we are, I hope we don’t turn into a totally smug settled couple though…

This mushroom tart is great if you have a mixture of wild mushrooms and is quite forgiving if they aren’t in the best nick. If you don’t have any wild mushrooms chestnut mushrooms would work pretty well instead. Having just got back from camping I was in no mood for making my own pastry and bought the readymade variety. I hold my hands up. Guilty as charged your honour. 

wild mushroom tart

Wild mushroom tart with lemon and thyme – adapted from River Cottage Handbook No 1: Mushrooms
Serves 2
Oven preheated to 180°C

250g of all butter puff pastry
25g of butter
½ red onion – very finely chopped
roughly 300g of mixed mushrooms – cleaned and cut into equal sized chunks
2 small cloves of garlic – very finely chopped
breadcrumbs – made from 1 thick slice of white bread
grated zest from ½ a lemon
1 heaped tbsp of grated Parmesan
2 tbsp of chopped flat leaf parsley
couple of sprigs of thyme
salt and pepper to season
1 egg – beaten

Roll out the pastry till it is approx 3 mm thick.
Put the pastry onto a baking tray or into an oven proof frying pan and set aside till later.
Fry off the onion until translucent over a moderately high heat.
Reduce the heat down to medium and add the mushrooms and thyme.
Cook for approx 3-4 minutes till just beginning to soften.
If they are producing a lot of juice, drain this off and continue cooking.
If the pan is looking a little dry add a little more butter.
Add the garlic to the mushrooms and cook for a further couple of minutes.
Remove from the heat and add the breadcrumbs, lemon zest, Parmesan and parsley to the mushrooms and mix.
Season well to taste.
Add the mushrooms to the pastry, leaving a few centimetres around the edges so that it can puff up nicely.
Brush the edges of the pastry with the beaten egg.
Bake for approx 20 minutes until the pastry has puffed up and turned a golden brown colour.

Enjoy.


Wednesday, 21 September 2011

Jersey Shore


I’ve spent the last week on Jersey visiting my incredible little sister or Wee Skanky as she is affectionately known. It’s been a week of watching Roman Duris movies, drinking disgusting quantities of Pimms and long, late night chats about boys. I had a really great time.

I thought today dear reader, if you don’t mind, I would deviate away from my normal course of writing a recipe and instead give you a quick run down of my holiday culinary highlights. I hope you don’t mind too much.

I wanted to write about where we had eaten because I was so impressed by the quality of all the food I managed to scoff my way through last week. I wouldn’t want you to miss out…

Not remotely bohemian but it is Michelin starred. It’s the best 3 course meal I think I’ve had for under £25 quid.

No photos of the meal in bohemia, I didn't want to do the photo taking thing in there. Make do and mend with one of wee skanky and me instead.

A sweet little cafe on a pretty square in St Malo. It is a wonderful place to sample the famous Breton galette.

Buckwheat galette for breakfast of course

I’ve been fantasising about the welks for a week now. Simple crustacean pleasure and French café culture personified.

Implements of torture?

crab, prawns, 2 different types of oysters. shrimp, periwinkles and wonderful welks

Cheap, super tasty and generally authentic Thai food from an understated beach hut. The beef massaman curry was particularly awesome.

dicq shack - worth every step of our 8 mile walk

massaman curry from dicq shack


 Enjoy.


Tuesday, 13 September 2011

Marrow made tasty


marrow made tasty

I’m sitting writing this entry in my sister’s garden in Jersey, it’s sunny and I am, at long last making use of my stupidly overpriced but trendy sunglasses. So far this year I've only had 3 occasions which would warrant wearing sunglasses and that’s not with out want of trying.

sexy marrow

I’m coming to terms with the fact that summer is on its way out. That warm samphire and crab salad may not happen this year, I might have missed the boat. I’ve been noticing the nights drawing in and that cashmere jumper getting put on every so often. Summer is being slowly pushed out the door but for today at least I’m going to enjoy it. The plan for the afternoon is to take a cycle down to the next village. I have a romantic notion of finding a roadside veg stall and a country pub but perhaps at the back of my mind I’m wondering if that all sounds a little too energetic and maybe I’m best staying here, reading my molecular gastronomy book and drinking gin? Oh the joys of being on one’s jollies.

breadcrumbs - very exciting

I think this recipe, adapted from Mark Hix’s “Seasonal British Food”, is prefect for this time of year; light but cosy. However, my main reason for making this recipe was one of curiosity. Can a marrow really be tasty enough to warrant 2 pages in his lovely book? The short answer is yes.

all ready to go in the oven

Marrow made tasty la Mark Hix –serves 2
Preheat the grill to a high setting

1 moderately sized marrow – halved with seeds removed, each half is then cut into 1-2 cm slices
2 slices of bread turned into breadcrumbs – it can be either brown or white, doesn’t matter
1 medium onion – finely sliced
4 cloves of garlic – finely sliced
4 rashers of bacon or cured ham such as Iberico or a 2 inch chunk of saucisson cut into 0.5-1cm sized cubes
couple of stalks of thyme – leaves stripped from the stem
small handful of flat leave parsley – roughly chopped
vegetable oil for frying
sea salt and pepper to season

Grill the breadcrumbs for a few minutes until crisp and golden, remove from the heat and set aside until later in a large bowl.
In the mean time fry the onions in a pan with oil on a moderately high heat until soft and beginning to get gooey, this should take approx 10 minutes.
Add the bacon or whatever you are using and cook though for a few minutes.
Add the thyme and garlic to this pan and fry for another 2 minutes then add this to the bowl containing the breadcrumbs.
In the same pan that has been used for the onion and bacon add in the marrow, this may need to be done in 2 batches.
The marrow is cooked when the edges have turned golden brown and the flesh is translucent.
Season the marrow well with salt when cooking, taste and adjust as necessary.
Once cooked add the marrow to an ovenproof dish.
Add the parsley to the breadcrumb mixture and pour this on top of the marrow.
Season with salt and pepper.
Grill for about 5 minutes.

Serve with some nice crust bread and a glass of wine (compulsory).

Enjoy.


Tuesday, 6 September 2011

Pear and cardamom cake


pear and cardamom cake


I’m trying to let go of my perfectionist tendencies. They aren’t always that helpful. Last week I finished “Bird by Bird” by Anne Lamont. She said “they keep us standing back or backing away from life; they keep us from experiencing life in a naked and immediate way”. The challenge was on to drop this bad habit of mine.

I know if I want to write better I have to loosen up a bit. A couple of weeks before reading the book my wonderful friend Nic was over. We were having a cooking afternoon in my flat and she made a savoury loaf cake with feta and olives. She broke all the cardinal cake baking rules. She didn’t sift the flour. Gasp. She didn’t wait for the oven to preheat. Gasp. She opened the door whilst it was cooking. Gasp… Ultimately it was fantastically tasty so all my worrying was in vain. It was a really lovely afternoon.

pear and cardamom


As part of an effort to dampen down my "uptightness" I decided to try a new recipe for a cake idea I had in my brain, tempting me, for the past few months. The said cake was a pear and cardamom sponge. This recipe was taken from the fantastic “Girl Interrupted Eating” blog. This blog is really wonderful; full of lovely seasonal, nose to tail type recipes. This cake recipe is essentially a framework allowing you to adapt your cake to the ingredients you want to add. It seemed to good to be true. What if it didn’t work? What if those ingredients were wasted? What about those starving children in Africa? I need not have worried. The cake was delicious, light and intriguing. Panic over. I’ve just taken a few baby steps. The process to try to put things in perspective is one that will continue. The next challenge is to transfer that principle from the kitchen to the world beyond.

pear and cardamom cake


Pear and cardamom cake - taken from "girl interrupted eating"
Oven preset to 175 degrees, 9-inch spring form cake tin

175g butter at room temperature
175g caster sugar
3 eggs
175g of pear- grated
175g self raising flour
1tsp bicarbonate of soda
4 cardamom seeds ground

Prepare the tin by greasing and dusting the tin with flour.
Mix together the sugar and butter with an electric whisk until smooth.
Add in the eggs and mix.
Stir in the grated pear.
Mix the flour with the bicarbonate of soda and ground cardamom, add this to the mixture and fold in.
Pour into a tin and bake for approx 35 minutes or until golden on top and skewer inserted into the middle of the cake comes out clean.
Leave to cool in the tin for 5 minutes then turn out onto a wire rack to cool completely.

Enjoy.

all gone...on my hips


Tuesday, 30 August 2011

Mushroom hunting part 2: the ubiquitous wild mushroom risotto


One of the laws of physics states that for every glut of foraged chanterelle mushrooms a risotto must be made. Yep it’s predictable but it is perhaps it is predictable because it is just so good, a classic if you will. I think keeping things simple is the best way to show these bad boys off.


In my defence of being boring I thought I would write a list of other potentially boring but ultimately enjoyable/good things –

            Sunday papers
Hong Kong style sweet and sour chicken
Holidays in France
Pyjamas
Radio 4
Stacy from “Gavin and Stacy”

Convinced? Perhaps not but here is my recipe for wild mushroom risotto anyways.


Wild mushroom risotto
Serves 4

300g of risotto rice - arborio, vialone and carnaroli all work well.
2 large onions - finely chopped
2-3 stalk of celery - finely chopped
4-6 cloves of garlic – finely chopped
a large glass of white wine
1 small pot of chicken stock (about a litre)  - keep on a rolling boil throughout the cooking process
400g of cleaned wild mushrooms - chanterelles, hedgehogs and ceps work particularly well, cut in halves or quarters if particularly large
1 tub of mascarpone, about 225g
50g of parmesan
a handful of coarsely chopped parsley
salt and pepper
olive oil and butter

Pop some olive oil and butter in a pan and over a low heat cook the onions and celery. Let these soften for the best part of 10 minutes.
Add the garlic and continue cooking for another couple of minutes.
Do not let the onion et cetra go brown, the idea is that it is sweet and translucent.
Season with salt.

Turn up the heat a little and add the rice, cook for a minute stirring all the time.
Do no let the rice go brown as this will reduce the amount of starch you can get out of it.
Once the edges of the rice have gone clear add in the wine.
It should sizzle as it hits the pan, keep stirring until 70% or so of the liquid has been absorbed.
Add one ladle of the stock into the rice at a time, stirring fairly continuously until most of the stock is absorbed before adding the next ladleful.
The more elbow work you put into your risotto the more gooey starchy wonderfulness it will release, this will ensure you have a lovely unctuous risotto.

After about 12 minutes of cooking the rice pop the mushrooms into a frying pan with a little oil and some butter.
Cook until golden and slightly crispy.

When the risotto is a minute off being ready add the parsley, mascarpone and Parmesan.
The rice will take about 16-18 minutes to cook, once al dente add in the mushrooms, perhaps saving a few for looking pretty on top.
Season to taste.

Enjoy.